
▼ iOS 17.4 and Later
|
1Open the email with your eSIM information, long-press and hold the displayed QR code. Then tap [Add eSIM].

※ Depending on your screen and text size settings, the [Add eSIM] option may not be visible. Please scroll down the options panel to locate [Add eSIM].
|
2When prompted to share your device EID number, tap [Activate]. You will proceed to the Activate eSIM screen, follow the on-screen instructions to complete the setup.
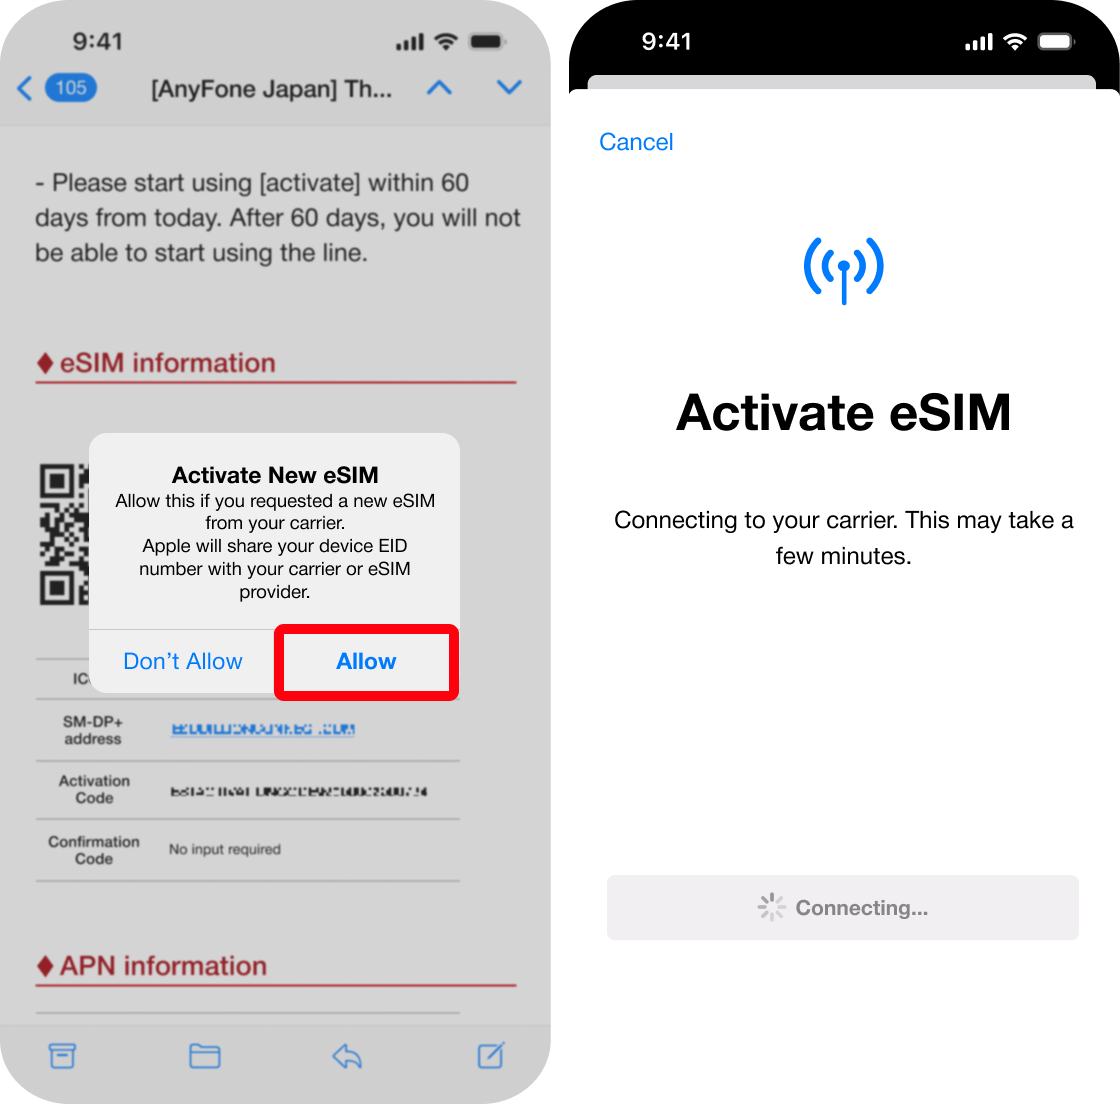
|
※ In some email apps, pressing and holding the QR code may not work, or the [Add eSIM] option may not appear.
If that happens, please use one of the methods in “Method B to C” below, or use the default iPhone Mail app.
▼ iOS 17.3 and Earlier
|
1Open [Settings] and tap [Cellular].

|
2Tap [Add eSIM], then select [Use QR code].

|
|
3Tap [Scan QR Code], and the camera will be activated. You can now choose one of the following options:

|
<Method B:Enter Details Manually>

|
|
<Method C:Scan from Another Device>
|
iImportant Notes
|
■ Activation Settings
|
1Installation of eSIM profile will begin.

|
2Once activation is complete, if the screen asks "Which type of plan are you using?", select "Data Only" and tap "Continue".

|
|
3When you see "eSIM setup for travel complete", tap "Done" at the bottom of the screen. Activation Completed!

|
■ Connection Settings (Upon Arrival)
|
1Open the "Settings" app and tap "Cellular" (or "Mobile Data" depending on your region).

|
2Select the newly added eSIM from the list.

|
|
3Turn on (enable) the following two items:

|
Connection setup is complete! Your eSIM is now ready to use.
Please note that screen displays and steps may vary slightly depending on your device model and OS version. |