




▼ iOS 17.4 and Later
|
1Open the email with your eSIM information, long-press and hold the displayed QR code. Then tap [Add eSIM].

※ Depending on your screen and text size settings, the [Add eSIM] option may not be visible. Please scroll down the options panel to locate [Add eSIM].
|
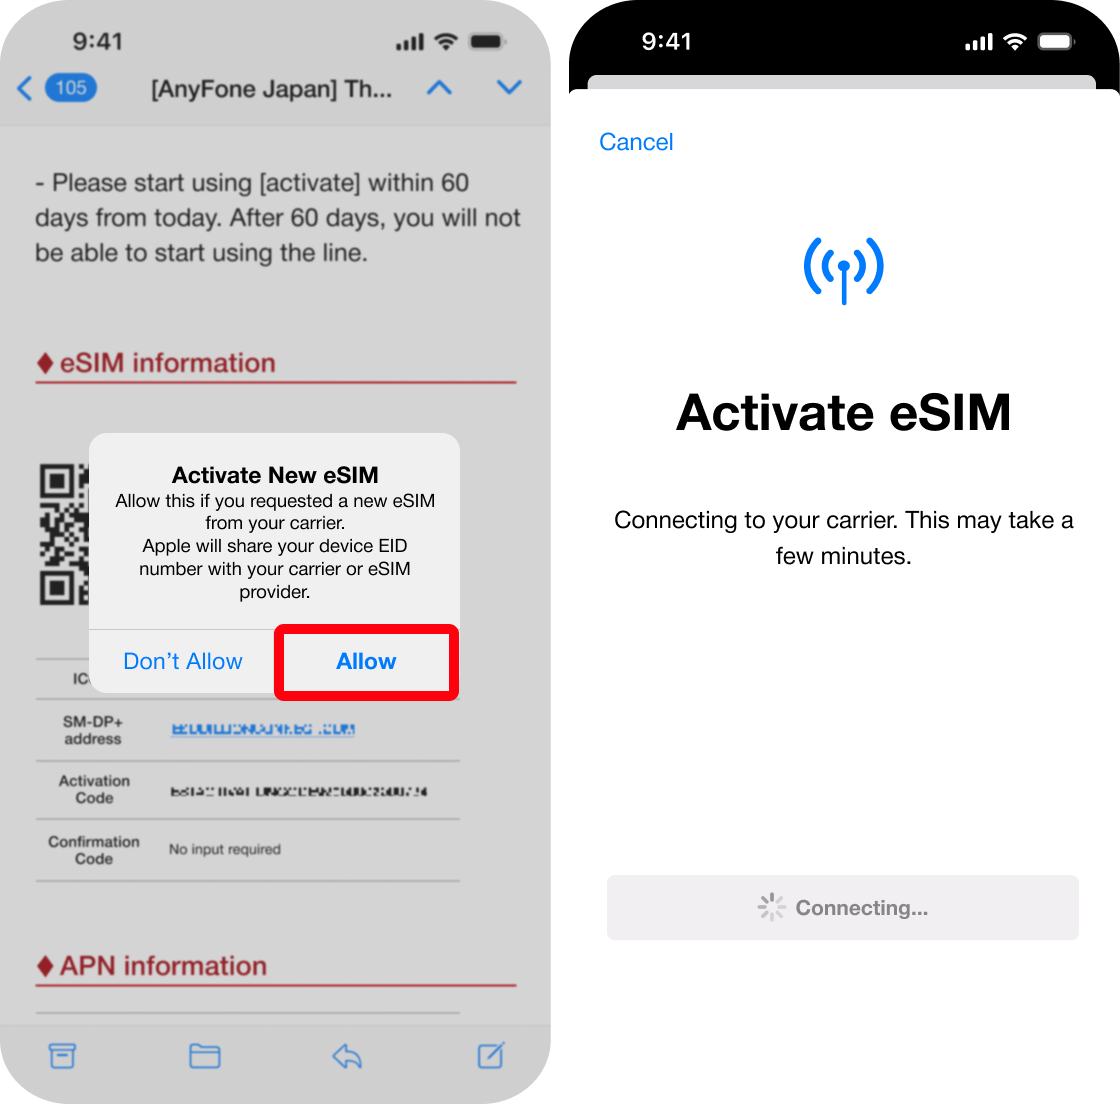
2When prompted to share your device EID number, tap [Activate]. You will proceed to the Activate eSIM screen, follow the on-screen instructions to complete the setup.
|
※ In some email apps, pressing and holding the QR code may not work, or the [Add eSIM] option may not appear.
If that happens, please use one of the methods in “Method B to C” below, or use the default iPhone Mail app.
▼ iOS 17.3 and Earlier
|
1Open [Settings] and tap [Cellular].

|
2Tap [Add eSIM], then select [Use QR code].

|
|
3Tap [Scan QR Code], and the camera will be activated. You can now choose one of the following options:

|
<Method B:Enter Details Manually>

|
|
<Method C:Scan from Another Device>
|
iImportant Notes
|
■ Post-Activation Configuration
For detailed instructions on communication settings after activation, please refer to the official Apple Support page (external link) below.
Set up eSIM on iPhone - Apple Support


